


Creating a captive portal VM for Sculpt
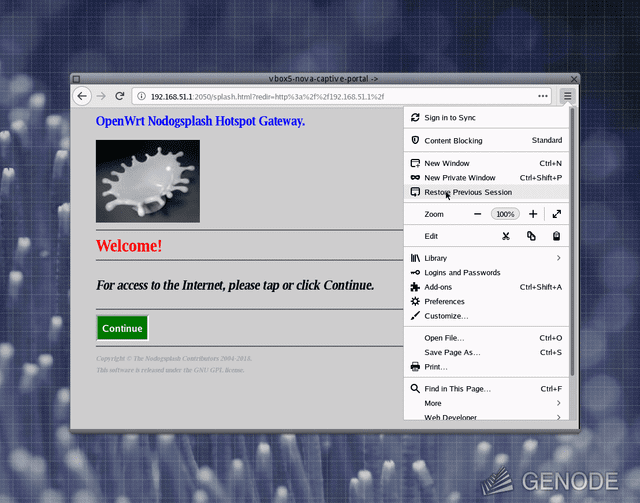
Some 3 years ago, I worked on a minimal and disposable VM for Sculpt that is capable of viewing the landing page of a local network. In many networks, this is necessary in order to gain internet access and therefore even before being able to deploy third-party packages in Sculpt. This article is a briefly polished version of the tutorial I created back then. But it should still apply to newer Sculpt versions. It uses VirtualBox 5 and with TinyCore guest running Firefox.
|
Before starting, I'd also like to mention some additional recources created by Johannes Schlatow that accompany the tutorial:
-
Some tooling for remastering TinyCore images at https://github.com/jschlatow/tinycore-remaster
-
A documentation of the efforts of applying this tutorial to newer versions of VirtualBox and TinyCore at https://github.com/genodelabs/genode/issues/3462#issuecomment-871356837
If you find any bugs in the tutorial, please report them to me!
Set up TinyCore
Set up a VM
-
Go to the host shell
 sudo apt install virtualbox # we used virtualbox version 5.1.38
 wget https://distro.ibiblio.org/tinycorelinux/10.x/x86/release/Core-10.1.iso
 wget https://download.virtualbox.org/virtualbox/6.0.4/VBoxGuestAdditions_6.0.4.iso
 virtualbox &
-
Go to the VirtualBox window
-
Create a new VM with network
-
Type: Linux
-
Version: Other Linux (64-bit)
-
RAM: 1G
-
HDD: create new, 1G, vdi, dynamic
-
-
Start the VM
-
Select Core-10.1.iso as initial disk of the VM
Prepare hard disk
-
Go to the VM shell (the following steps were created using http://tinycorelinux.net/install_manual.html)
 [Enter]                              # boot to user shell
 tce-load -wi cfdisk grub-0.97-splash # download extensions cfdisk and grub
 sudo su                              # open root shell
 cfdisk /dev/sda                      # create partition on hard disk
   New
     Primary
     [Enter]
   Bootable
   Write
     yes
   Quit
 mkfs.ext3 /dev/sda1 # format partition
 rebuildfstab        # re-create file system table
 mount /mnt/sda1     # mount hard disk
Install grub
 mount /mnt/sr0                                     # mount disk drive
 mkdir -p /mnt/sda1/boot/grub /mnt/sda1/tce
 cp -p /mnt/sr0/boot/* /mnt/sda1/boot/              # install kernel, initrd
 cp -p /usr/lib/grub/i386-pc/* /mnt/sda1/boot/grub/ # install grub
 touch /mnt/sda1/tce/mydata.tgz                     # file for TinyCore backup/restore
 vi /mnt/sda1/boot/grub/menu.lst                    # create grub menu config
-
Go to insert mode: i
-
Insert this
 default 0
 timeout 0
 hiddenmenu
 title tinycore
 kernel /boot/vmlinuz quiet restore=sda1/tce
 initrd /boot/core.gz
-
Write and quit: [Esc]:wq
 grub
   root (hd0,0)
   setup (hd0)
   quit
halt
-
Go to the VirtualBox Window
-
Remove ISO from VM disk drive
-
Restart VM
Set up GUI and Firefox
Basic set-up of GUI and Firefox
-
Go to the VM shell
tce
-
Search: s
xorg
-
Select "xorg-7.7.tcz"
-
Install: qi
-
Quit: q
 tce-load -wi i3 firefox_getLatest
 firefox_getLatest.sh
 vi /mnt/sda1/tce/onboot.lst
-
Insert mode: i
-
Replace firefox_getLatest.tcz with firefox.tcz
-
Write quit: [Esc]:wq
 rm -f /mnt/sda1/tce/optional/firefox_getLatest*'
 sudo reboot
-
Check that i3 welcome message appears
 [Right-Control]+[F1]          # switch to shell
 pkill Xorg                    # stop xorg, i3
 sudo mkdir /mnt/sda1/bin
 sudo vi /mnt/sda1/bin/browser # create script to keep Firefox running
-
Insert mode: i
-
Insert this
 #!/bin/sh
 while true; do                # restart Firefox everytime it gets closed
   /usr/local/bin/firefox
 done
-
Write, quit: [Esc]:wq
 sudo chmod +x /usr/local/bin/browser
 vi /home/tc/.i3/config # configure i3
-
Insert mode: i
-
Replace content with this (created using docs/userguide in https://i3wm.org/downloads/i3-3.e-bf3.tar.bz2)
 font -misc-fixed-medium-r-normal--13-120-75-75-C-70-iso10646-1
 workspace_bar no           # disable i3 bar
 new_window bb              # disable window title and borders
 exec /mnt/sda1/bin/browser # start our custom browser script
-
Write, quit: [Esc]:wq
vi /opt/.filetool.lst # configure TinyCore backup/restore mechanism
-
Insert mode: i
-
Replace content with this
 opt/.filetool.lst
 home/tc/.i3/config
 home/tc/.xsession
 home/tc/.mozilla
-
Write, quit: [Esc]:wq
 sudo filetool.sh -b # backup configuration files to mydata.tgz
 sudo reboot
-
Check whether Firefox appears maximized, no borders, no title bar, no desktop bar, always restarting when closed
Customize Firefox
-
Go to the Firefox window in the VM
-
Open "Menu -> Preferences -> General"
-
Unset "Always check if Firefox is your default browser"
-
Go to "Home"
-
Set "Homepage and new windos" to "Custom URLs" and the URL to "genode.org"
-
Set "New Tabs" to "Firefox Home"
-
Remove all unnecesary items around the Firefox address bar (right-click on item and select "Remove from Toolbar")
 [Right-Control]+[F1] # switch to shell
 pkill browser        # stop browser script
 [Right-Control]+[F2] # switch back to Firefox
-
Close all tabs so Firefox closes
 [Right-Control]+[F1]                                      # switch to shell
 cd /home/tc/.mozilla/firefox/<SOME_CHARS>.default-release # go to Firefox profile dir
 mkdir chrome
 sudo vi chrome/userChrome.css
-
Insert mode: i
-
Insert this (disables Firefox tab bar)
#TabsToolbar { visibility: collapse !important; }
-
Write, quit: [Esc]:wq
 sudo filetool.sh -b # back-up Firefox configuration
 sudo reboot
-
Check whether Firefox appears with the desired configuration and without a tab bar
Make VM resizable
Prepare original VM
 [Right-Control]+[F1] # switch to shell
 pkill Xorg           # stop xorg, i3, Firefox
 tce-load -wi openssh # we need the 'scp' command
-
Install graphics-4.19.10-tinycore.tcz using the method we used for xorg-7.7 (this installs DRM required by vboxvideo)
vi /home/tc/.xsession add this
-
Insert mode: i
-
Append this at the end
 setxkbmap -layout "de" -variant "nodeadkeys"' # set your keyboard layout here
 VBoxClient --display                          # starts vbox display client for VM resizing
 exec i3                                       # execute i3 explicitely
-
Write and quit: [Esc]:wq
 filetool.sh -b # backup xorg configuration
 sudo halt
-
Go to the VirtualBox window
-
Close the VM (switch off)
Build and archive guest additions in second VM
You may skip this step if you already have the guest-additions extension-files. (can be downloaded: https://raw.githubusercontent.com/m-stein/genode/vbox_guest_additions_604_tinycore_101/repos/vboxga604.tcz https://raw.githubusercontent.com/m-stein/genode/vbox_guest_additions_604_tinycore_101/repos/vboxga604.tcz.md5.txt)
-
Clone VM (the second VM is only for creating a guest additions extension without polluting the first VM and can be thrown away afterwards)
-
Insert VBoxGuestAdditions_6.0.4.iso into disk drive of second VM
-
Set ram of second VM to 2G
-
Start second VM
-
Go to window of second VM
 [Right-Control]+[F1]                  # switch to shell
 pkill Xorg                            # stop xorg, i3, Firefox
 tce-load -wi linux-kernel-sources-env
 linux-kernel-sources-env.sh           # install Linux kernel sources
 mount /mnt/sr0

 # remember a time from before building guest additions
 sudo touch /tmp/mark
 sudo /mnt/sr0/VBoxLinuxGuestAdditions.run # build guest additions

 # write list of files created by the guest additions
 find /opt /sbin /usr /lib /etc -cnewer /tmp/mark -not -type d > /tmp/files
-
You can now check whether resizing works by executing startx
 sudo tar -T /tmp/files -czvf /mnt/sda1/vboxga604.tar.gz    # archive all files of the list
 scp /mnt/sda1/vboxga604.tar.gz <HOST_USER>@<HOST_IP>:/tmp/ # send archive from VM to host
 sudo halt
-
Go to the VirtualBox window
-
Close second VM (switch off)
Create guest additions extension from archive
You may skip this step if you already have the guest-additions extension-file.
-
Go to the shell of your host
 mkdir /tmp/vboxga604
 cd /tmp/vboxga604
 tar -xf /tmp/vboxga604.tar.gz
 cd /tmp
 mksquashfs vboxga604/ ~/vboxga604.tcz
 cd ~
 md5sum vboxga604.tcz > vboxga604.tcz.md5.txt
Install guest additions extension
-
Go to the VirtualBox window
-
Start first VM
-
Go to window of first VM
 [Right-Control]+[F1]                            # switch to shell
 pkill Xorg                                      # stop xorg, i3, Firefox
 scp <HOST_USER>@<HOST_IP>:/tmp/vboxga604.tcz* \ # send extension from host to VM
   /mnt/sda1/tce/optional/
 rm -f /mnt/sda1/tce/optional/openssh*           # uninstall openSSH
 vi /mnt/sda1/tce/onboot.lst                     # install guest additions extension
-
Insert mode: i
-
Replace 'openssh.tcz' with vboxga604.tcz
-
Write quit: [Esc]:wq
sudo reboot
-
Check whether VM is resizable