


Making the MNT Reform my own
This is the little embarrassing story of my first customization of the MNT Reform laptop that I received just two weeks ago.
At Genode Labs, we already got our hands on an early unit of the MNT Reform last year. But when we received the shipment of the final product two weeks ago, I got still utterly impressed. The ethos behind it speaks to me on so many levels. For example, the first page of the "Quick Start" chapter of the manual literally says: "... unscrew the 10 bottom screws and remove the bottom plate." How cool is that? In contrast to the consumerism all around us, this device is designed to be taken apart, to be repaired, to be upgraded, to be investigated. Moreover, it is so tastefully executed that feels like piece of art. The handbook carries the empowering message extremely well:

|
|
It's your's. You are the boss. Make it your own. Or not. However you like.
|
Whereas Stefan is taking the remaining steps needed to bring Sculpt OS to the MNT Reform, I started tinkering with the laptop from a user's perspective in the evenings: Compiling and using tool chains, working on AARCH64 system-call bindings for Genode, browsing HN, or playing around with the pre-installed selection of software like the sway compositor.
I'm an avid trackball fan, using a CST L-TRAC at work and a Logitech M575 at home. So I went with the trackball version of the MNT Reform without a second thought. Even though the MNT-Reform trackball functions well as an input device, it did not give me the level of enjoyment I anticipated. Maybe, it's just me being spoiled by the trackball luxury that I enjoy under my fingers every day, but the MNT Reform's trackball felt a bit like a compromise at first. I'd describe the feeling as a little scratchy, like if there were little sand grains getting in the way of the ball movement from time to time. It is sometimes paired with a somewhat squeaky sound. So I went on to investigate.
Diagnosis dilettante
Knowing that the trackball housing is 3D printed and having seen many 3D-printed objects with these typical grainy surfaces, I suspected that the uneven friction may have been caused by a small edge artifact left over by the 3D printing process. Let me confess that I have no clue about 3D printing whatsoever though. However, I'd certainly be able sense a tiny scratchy edge on otherwise smooth surface with my fingers, wouldn't I? Following the instructions of the manual for cleaning the ball, I took off of the two key caps left and right of the ball, unscrewed two tiny crews and got the ball out. Easy.
Sure enough, I could sense some sketchy grains with my index finger! I could immediately draw the connection between these small blemishes and the somewhat grainy sensation that I sometimes experienced while moving the trackball. Hobbyist craftsman activated! I quickly fetched a small sanding tool and swiftly smoothened the inner housing of the trackball until I got a perfectly even surface.
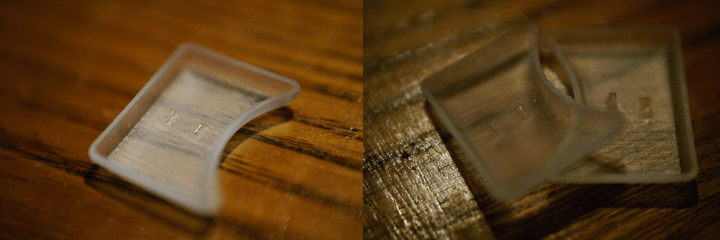
Eager to try out the new level of smoothness, I went to remounting the trackball's lid and key caps and was up for a shock. Apparently, I broke off the small legs of the key caps when I pulled them off. When looking closely, the debris was still stuck in the small holes at the top of the key switches whereas the key caps are probably broken beyond repair.
|
|
Guess I am not a hardware guy. The broken-off tiny legs are still sticking in the switches.
|
I learned that one needs to be ultra careful with removing the caps. Well, that's a setback. However, a second shock sunk in when trying out my modification and sensing that I only made the scratchiness worse!
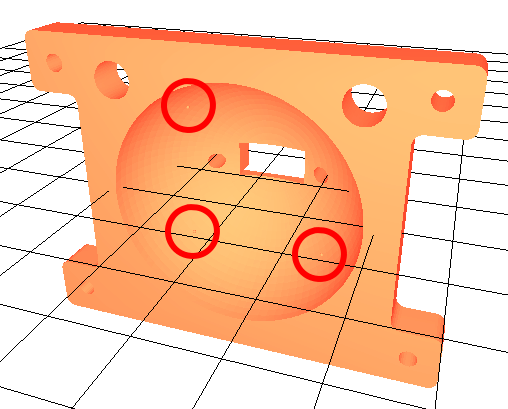
Could it be that the "blemishes" that I just sanded away had a deliberate purpose - such as - like possibly - maybe unlikely - minimizing the surface area between the ball and the housing? The answer can readily be found in the CAD model for the trackball housing.
|
|
These nubs are there for a reason.
|
Defeat on all fronts. Trackball scratchiness made worse? Check. Key caps destroyed? Check. Switches made incompatible with key caps because of sticky debris? Check. Sense of self-worth of my hardware skills destructed? Check.
Inspiration
After a bit of head scratching and soul searching, I decided to seek inspiration from the ultimate experts when it comes to trackball scratchiness. Ahh. Ohh. "bearings", "zirconia oxide vs. chromium steel" - a whole bunch of exciting search terms to spend some evenings with! The discussion comes down to the idea that the lowest friction between surfaces can be achieved by balls touching balls because the surface area between them is infinitesimally (cool word, isn't it?) small. The bearings won't need to move. They just need to be made of a hard material and must be stably mounted. In hindsight, it becomes perfectly clear that the little nubs in the trackball housing were playing the role of the bearings.
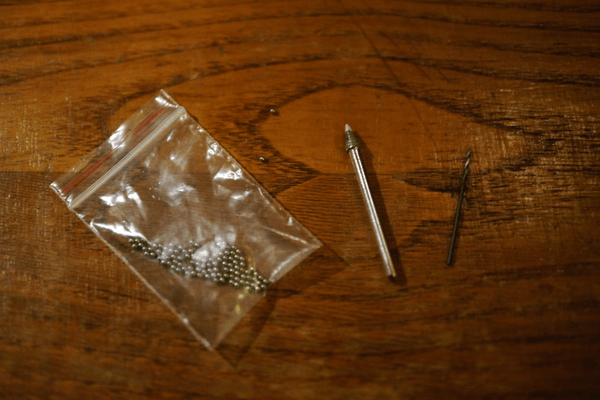
The gurus were speaking of big trackballs and 2.5 mm bearings. I figured that the MNT Reform's small ball would probably better be served with smaller bearings. Hence, I settled on these 1.5 mm chromium-steel balls. But that's not an informed decision but merely intuition. The trackball-bearing mods I found universally used three bearing balls to bed the ball on as opposed to the four nubs that had been present inside the MNT Reform's trackball. Three mounting points make intuitively more sense to me because a three-legged chair cannot wobble.
Modification
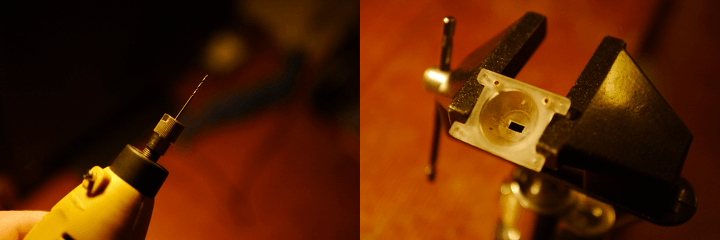
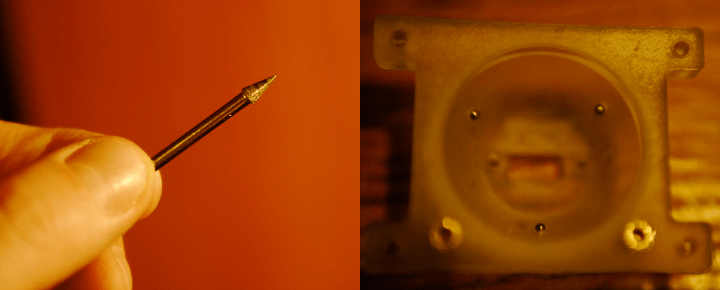
You can probably sense my excitement when I received the little balls a few days later. For stably mounting the 1.5 balls in the housing, I decided to first drill a 1 mm hole at each mounting point and then manually carve out the openings of the holes until the bearings sit almost flush with the surface. The hole will enable me to push out the balls from the other side using a needle while repeating the carving step, or if I ever decide to swap out the bearing later. So I picked a 1 mm borer and a hobby carving thingy that I found in my tool box.
|
I marked the hole positions by mere visual judgement such that they form roughly an equilateral triangle. The vertical position of the holes within the housing - the altitude so to speak - is most probably a trade-off between wobbliness and friction. When placing the three mounting points too low, the trackball can easily leave the designated mounting position. When mounting them too high, the trackball presses with a stronger force against the bearings. I simply picked the same altitude as the little numbs that I sanded away.
|
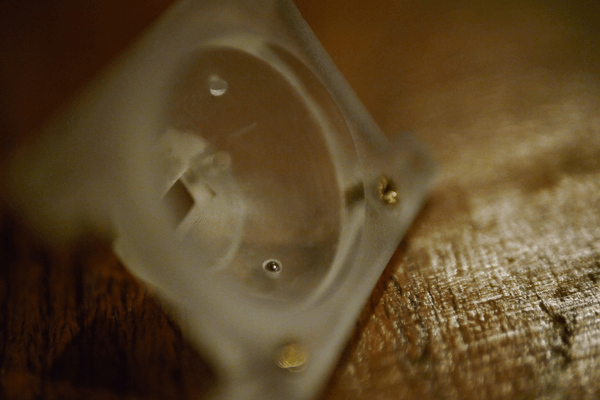
With the holes in place, I used the little carving tool to gradually widen the holes step by step. The more the holes got widened, the more snug and stable the bearings would become. Here you can see an earlier phase. The balls still stick out quite a bit.
|
After a few more iterations, the result looked like as follows.
|
Finally, the bearing ball got almost flush with the surface of the housing. One can actually turn the housing upside down without the ball falling out.
Outcome
The effect of this simple modification is quite stunning. Even though the smoothness is not on par with the CST L-TRAC, the trackball has become a wholly enjoyable device. The ball keeps spinning when I push it. The friction is low and also nicely consistent, which makes small movements more accurate to execute. Also, the audible experience is improved. There it not the slightest hint of squeaking any more. There is arguably a bit of wiggle when deliberately pressing against the ball from the side. It is presumably related to the altitude I picked for the three mounting points and the tolerances of the housing. But this effect does not impede the experience of using the device in any way.
As a bottom line, this simple and cheap modification is definitely worth it.
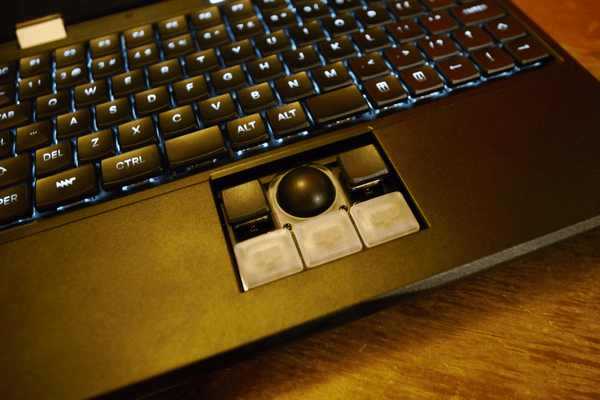
The second message worth taking away from this posting is to be extra careful whenever removing the trackball key caps. Their legs are very sensitive. I was fortunate to have some spare Kailh Choc key caps in the house (I guess like most good households). I figured that I could use a needle to push the debris further into the switch housing - just enough to give the new key cap a hold. I trimmed the legs of the new key caps such that the keys don't stick out too much. This is how my MNT Reform featuring my involuntarily button mod looks like:
|
|
Bonding phase between human and device completed.
|
Maybe I'll get some new caps printed and swap out the two spoiled switches sometime later. Or not. Or will I try out the trackpad for a change? This flexibility and serviceability is what makes me so excited about the MNT Reform.